
")


In this step-by-step guide, I will show you how to build a makeshift shelter using natural materials. The purpose of this guide is to help you acquire the necessary survival skills to create shelter in emergency situations where you may not have access to traditional camping equipment. By learning how to utilize the resources found in nature, you can construct a basic shelter that will provide you with protection and comfort.
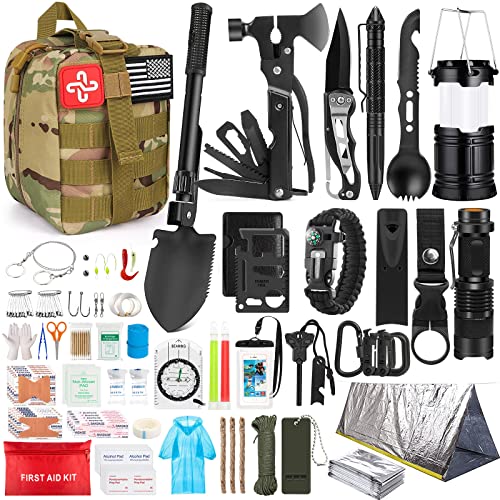
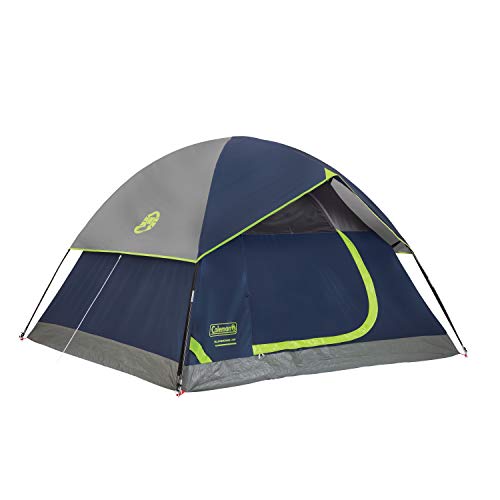
Top-Selling Survival Gear Essentials


Gather Materials
To collect natural materials for building a shelter, follow these steps:
- Step 1: Look for sturdy branches that can serve as the main framework of the shelter. Choose branches that are long and thick enough to provide stability.
- Step 2: Gather leaves to use as insulation and to cover the shelter. Look for large, broad leaves that can provide good coverage and protection.
- Step 3: Find vines or flexible branches that can be used to secure the different parts of the shelter together. These will act as ties or ropes to hold everything in place.
- Step 4: Collect rocks or stones that can be used as anchors or weights to secure the shelter and prevent it from shifting or collapsing.
Remember to always consider your safety and the environment when gathering materials.


Find a Suitable Location
Search for a location that offers protection from the elements and is close to a water source. Look for areas with natural barriers such as trees or cliffs that can shield you from strong winds or extreme weather. Additionally, prioritize locations near rivers, lakes, or streams, as they will provide you with a reliable source of water for drinking, cooking, and cleaning. For example, consider setting up camp near a dense forest that can shield you from harsh winds, or near a river where you can easily access clean water for your needs.
Clear the Area
To remove any debris or obstructions from the chosen site and create a clean and flat surface for the shelter, follow these steps:
- Survey the area: Walk around the site and identify any large rocks, branches, or other objects that could hinder the construction of the shelter. Remove them from the area and set them aside.
- Clear smaller debris: Use a rake or your hands to clear away smaller debris such as leaves, twigs, and loose soil. Make sure to remove any sharp objects that could pose a safety risk.
- Level the ground: If the chosen site is uneven, use a shovel or a garden hoe to level the ground. Remove any excess soil or rocks to create a flat surface for the shelter.
- Inspect for underground obstructions: Before proceeding, check for any underground obstructions such as tree roots or large rocks. Use a shovel to carefully dig around the area and remove any obstacles that might interfere with the shelter’s foundation.
By following these steps, you will ensure that the area is clear of debris and obstructions, providing a clean and flat surface for the construction of your shelter.


Create a Frame
To create a sturdy frame for your shelter, start by gathering thick and strong branches. Look for branches that are straight and free from any cracks or weak spots. Arrange the branches vertically, with the thicker ends on the ground, and lean them against a tree or a secure structure. Ensure that the frame is tall enough for you to comfortably sit or lie down inside. For example, you could use four branches, two on each side of the shelter, forming an A-frame shape.
Build Walls
Weave smaller branches or vines horizontally between the main frame to create walls for the shelter. Start by selecting branches or vines that are flexible and long enough to reach across the frame. Begin at the bottom and work your way up, intertwining the branches or vines tightly together. Ensure that the walls are sturdy and secure, providing a solid barrier for the shelter.


Cover the Roof
To cover the roof and create a waterproof barrier, start by layering leaves, grass, or other natural materials on top of the frame. Begin by placing a base layer of large leaves, overlapping them to ensure full coverage. Next, add a layer of smaller leaves or grass, again overlapping the materials. Repeat this process until the entire frame is covered, making sure to tightly pack the materials together for a secure fit. Finally, secure the roof by using vines or ropes to tie down the edges of the covering.
Insulate the Floor
To cover the ground inside the shelter for insulation and comfort, gather a sufficient amount of leaves or branches. Spread them evenly across the entire floor area, ensuring that no bare spots are left exposed. Press down on the foliage to create a compact layer that will provide effective insulation and a more comfortable sleeping surface.
Add Extra Support
To add extra support to a structure, you can utilize additional branches or rocks to reinforce its stability. For example, if you are building a shelter with branches, you can weave or attach extra branches to the existing framework to create a stronger structure. Similarly, if you are constructing a stone wall, you can carefully select and position rocks in areas where stability is needed, making sure they are securely placed to provide additional support.
Create an Entrance
To create an entrance, start by leaving an opening in the wall. Ensure that the opening is wide enough for easy access. Additionally, make sure the entrance can be easily covered using a door or a sturdy material to protect against wind and rain.
Test the Shelter
To properly test the shelter, begin by spending some time inside it. Sit or lie down to assess comfort levels. Check for any signs of insecurity, such as loose bolts or weak spots. Ensure that the shelter provides adequate protection from external elements like rain, wind, and extreme temperatures.
Key Takeaways
In conclusion, building a makeshift shelter using natural materials is not only practical but also crucial in a survival situation. Throughout this guide, we have explored the various steps involved in constructing a shelter with materials readily available in nature. By utilizing branches, leaves, and other natural resources, we can create a shelter that provides protection from the elements and improves our chances of survival. Remember, the key is to adapt and innovate with the resources around us, making the best use of what nature has to offer. So, whether you find yourself in a wilderness emergency or simply want to hone your survival skills, mastering the art of building a makeshift shelter with natural materials is a valuable skill to possess. Stay safe, stay prepared, and always remember the power of nature’s offerings in times of need.
Necessary items


Practical Techniques
Getting Familiar with Your Survival Gear
- Start by familiarizing yourself with the different pieces of survival gear you have. This could include items such as a knife, fire starter, compass, water filter, and first aid kit
- Learn how to properly use a knife by practicing basic cutting techniques. Keep the blade sharp and handle it with care to prevent accidents
- Understand how to use a fire starter to build a fire in case of an emergency. Practice creating a fire using different materials like dry leaves, twigs, and small branches
- Study the basics of orienteering and using a compass. Familiarize yourself with the various components of a compass and learn how to read maps to navigate your surroundings accurately
- Learn how to use a water filter or purifier to make water safe for consumption. Follow the instructions provided with your specific water filtration system and practice filtering water from different sources
- Remember that learning how to use survival gear properly is essential for your safety and well-being in emergency situations. It is recommended to seek guidance from experts or take survival training courses to enhance your skills and knowledge
Frequently Asked Questions about Survival Gear
What are some important factors to consider when choosing a survival knife or multi-tool?
When choosing a survival knife or multi-tool, there are several important factors to consider. Firstly, the blade material and design are crucial. Look for a blade made from high-quality stainless steel or carbon steel that is durable and resistant to corrosion. The blade design should be versatile and suitable for various tasks such as cutting, slicing, and piercing.
Another crucial factor is the knife’s size and weight. It should be compact and lightweight enough to carry comfortably while ensuring it is still robust and capable of handling demanding tasks. Consider your intended use and environment to determine the ideal size and weight for your needs.
The handle of the knife or multi-tool is also essential. It should offer a secure and comfortable grip, even in wet or slippery conditions. Look for handles made from durable materials like rubber, G10, or micarta that provide excellent grip and are resistant to wear.
Furthermore, the knife’s locking mechanism is vital for safety and reliability. Ensure that it has a strong and secure locking system to prevent accidental closure during use.
Additional features and tools offered by multi-tools should also be considered. Evaluate the versatility of the tools included, such as pliers, saw, screwdrivers, can opener, or fire starter. Opt for a multi-tool that includes the most useful tools for your specific needs.
Lastly, consider the overall quality and reputation of the brand. Look for well-established and reputable manufacturers known for producing reliable and high-quality survival knives or multi-tools.
By carefully considering these factors, you can choose a survival knife or multi-tool that meets your specific requirements and ensures you are prepared for any survival situation.
